

North Shore Swimsuit by Greenstyle Creations
The great thing about working with knit fabrics is that if you are bustier than average the stretch of the fabric will give you a bit of leeway when sewing your own clothes. However, to get the best from a pattern, those of us who are bigger than just above average will probably still have to make some adjustments.
While it’s natural to pick a pattern size based on your full bust measurement, if you have a larger cup size than the pattern is drafted for (lots of patterns are drafted for a B cup, but Greenstyle seems to be nearer a C/D cup as standard) you’ll end up with too much fabric at your neck and shoulders. However, choosing the pattern size based on your upper bust measurement and using a full bust adjustment (FBA) will give you the size you need at the bust without swamping you anywhere else (you may never go back to RTW when you see how much difference this makes!).
Once you’ve worked out what’s going on, doing an FBA isn’t that daunting and is really worth while. There are lots of good tutorials out there, but they normally deal with shirts or tees so I wanted to show you how I used the same technique for the Greenstyle North Shore swimsuit. It’s a bit of a rush job, but hopefully seeing the steps I went through will get you started.
A quick caveat… I am self-taught and I’m publishing this in the hope it will be useful, but please do read around on the topic – there are some very knowledgeable people out there! If you haven’t ever done a full bust adjustment before this playlist may help you: Made to Sew: FBA
For context, when doing this I was a UK 30G in bras (which, depending on manufacturer is about a US 30I). My underbust measurement was 29″, full bust was 37″ and upper bust was 34″.
Steps
- Take your upper/high bust measurement (just under your arm pits):

- Use this to pick your base size (in my case XS for the North Shore)

- Take your full bust measurement (at the largest point) and compare it to the largest bust size for the pattern size you picked.
- In my case, the XS is 34-35” and my full bust is 37” so I want to add 2” to the pattern )this will put me at the top end of the new size, so I’ll need to double check fit!)
- Because we’re dealing with half the pattern we want to add 1” width to each bodice piece
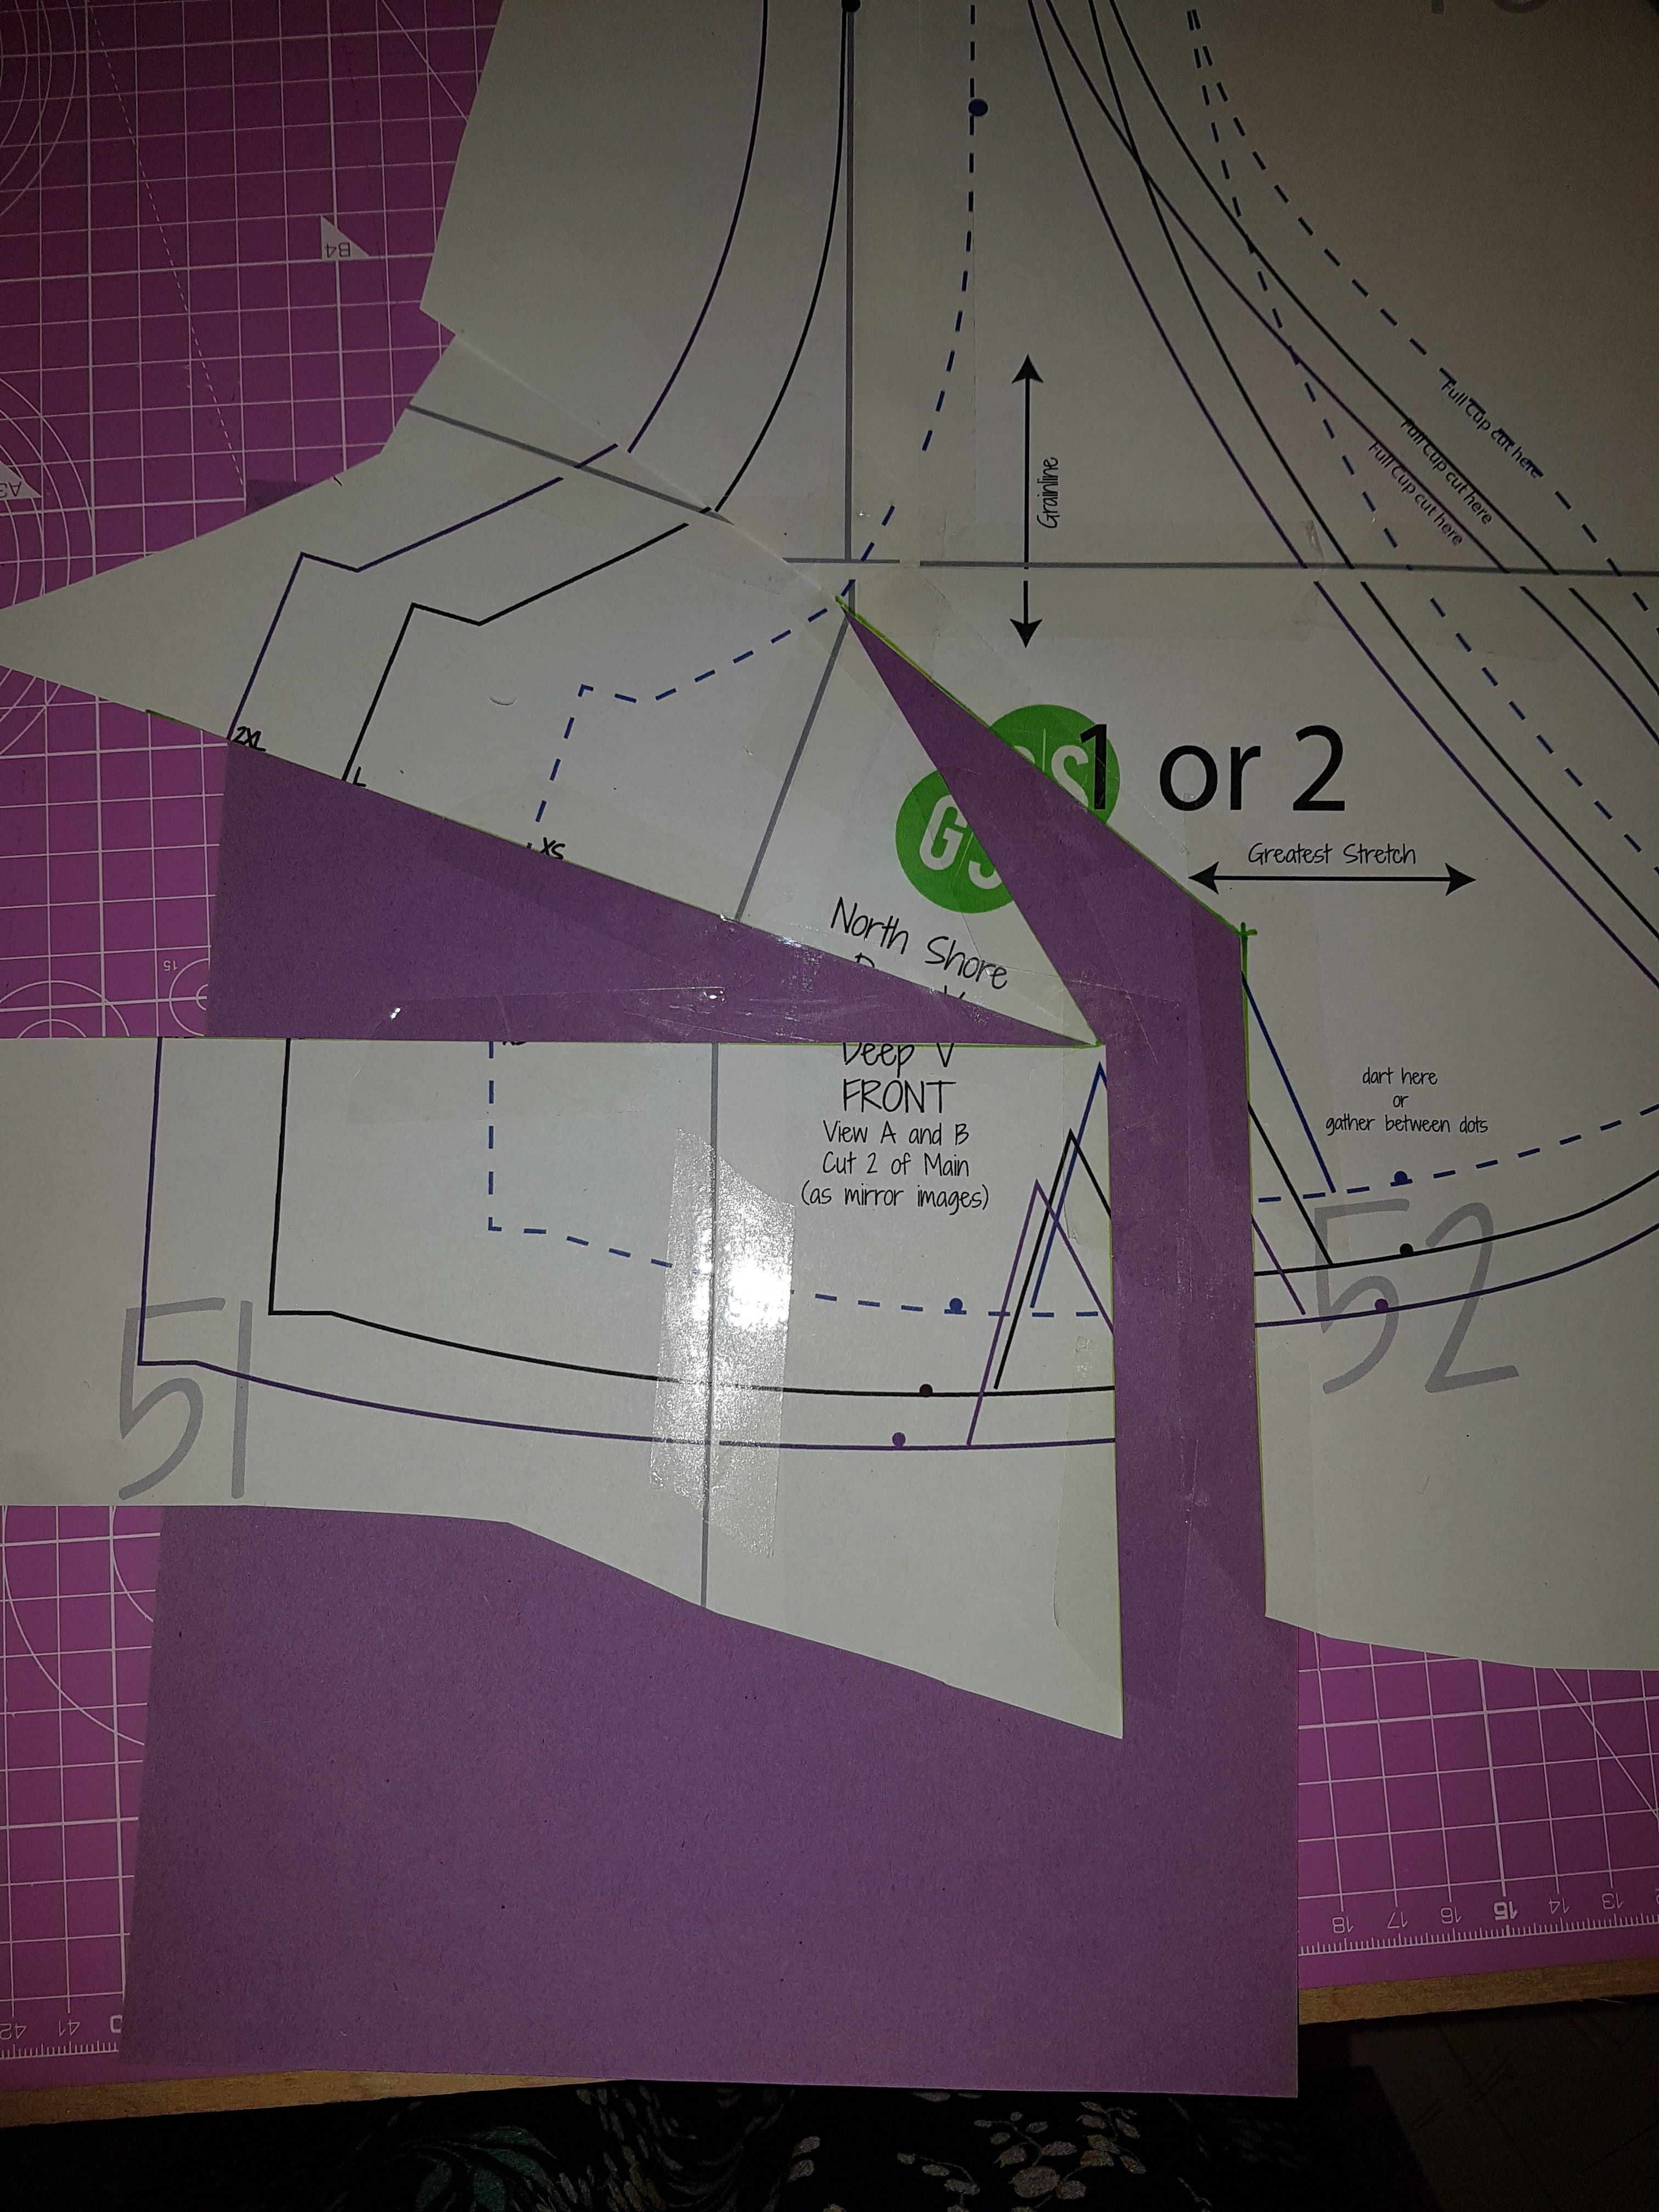
- Take your pattern piece (I’ve cheated as I knew where it would fall so only printed 3 size layers to make it easier to see) and mark on it where the bust apex (the ‘point’ of your boob) would be for your base size. This will be a bit of a guess, but it worked for me putting it at approx. the green +for the XS.

- Draw a line from the apex to about halfway in the curve of the arm scy
- Then, down from the apex vertically and across to the side seam horizontally.
- Cut up the vertical line and then up the diagonal line to the arm scy – stopping just before you get there as you’ll be pivoting at this point. Also cut in from the opposite direction, not cutting right through, so it can pivot on both sides.
- Cut from the side seam along the horizontal line almost to the apex point (you’ll also pivot here so don’t cut right through)
- Place a piece of paper behind the pattern piece (I used purple so it would show up) and tape down the right hand edge of the vertical cut to stop it sliding around.
- Now pivot the left hand pieces to create a vertical gap the same width as the amount you want to add (in this case 1”)
- Tape the pivoted pieces to the new piece of paper below
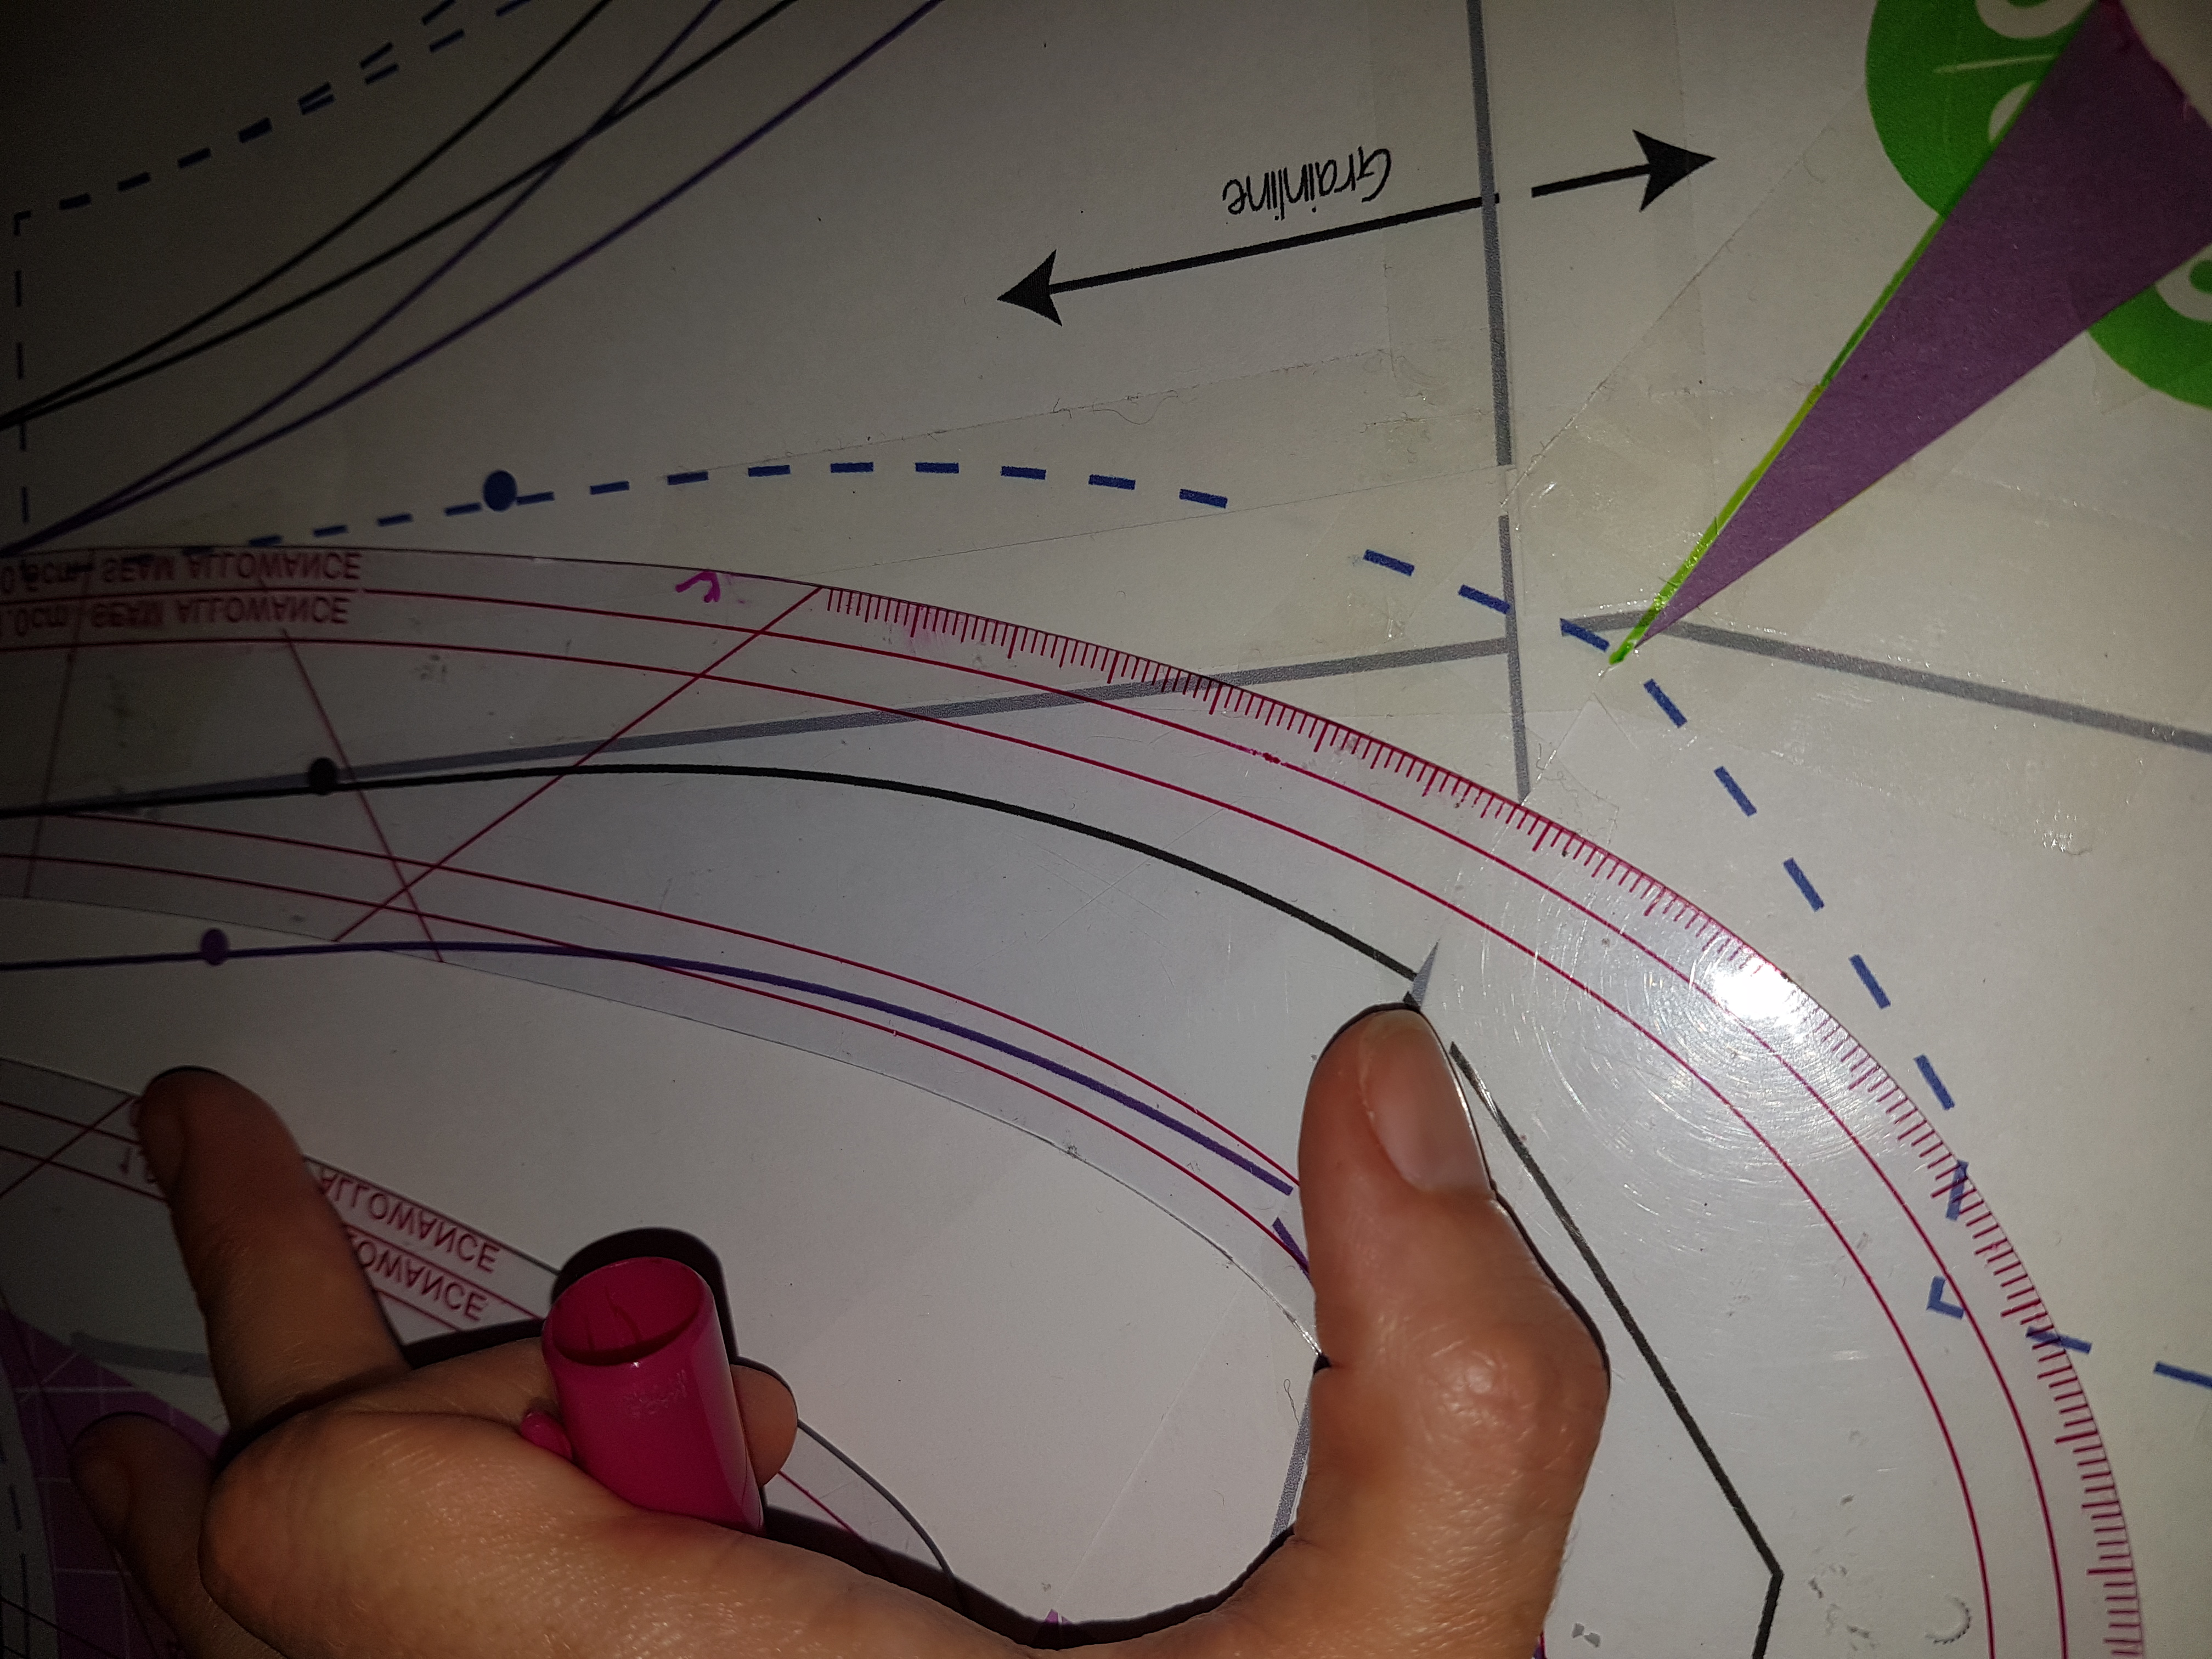
- Now you want to redraw the bottom curve. Handily, in this case, the lowered XS line is a close match to the original 2XL line so I drew a curve to join them
- You’ll now want to redraw gathering marks/bottom darts. I’ve gone for gathering dots only here and measured the distance from the left vertical edge of the extra width you added to the 2XL dot, then measured the same distance from the right hand vertical edge, across the gap to the new dot position.
This means the gather marks will be the same width apart as on the original pattern and they will be positioned based on the original position of the centre-most gathering dots. One you’ve sewn in the gathering basting stitches you may want to check the positioning and adjust if necessary.
- Next, we’ll redraw the arm scy. You’ll want to hold the pattern piece against you to get a sense of how much you need to add as it will be different for everyone.
- Now we will add the side dart. We’ll use the gap we created when pivoting, but we want to angle it up towards the new apex (bust point) to get a nice shape. You don’t want to go all the way to the apex with the dart point – stop an inch or so away.
N.B. Your apex may not be in the same place as mine – you’ll need to measure this. There is a video here, which may help: How to measure your bust apex
- Now you can cut out your new pattern piece which will now be both wider and deeper and you can do some testing. If this works straight off, hooray! However, you may well need to tweak it after making a muslin. Depending on where you hold volume in your boobs you make need more space at the bottom or on the sides and the shape of the pattern will have an impact on this.
- Don’t forget that if you’re doing the tie front you’ll need an FBA there as well…
I was a bit lazy and laid my altered bodice piece over the tie piece and did a bit of tracing and then adjusted the curve of the tie


Here are some pictures of how mine turned out:


They are all the deep V, full cup bodice and the bikini has the tie front overlay as well.
This pattern is lovely and really doesn’t take a lot of work to be great for big boobs – enjoy making yours and enjoy wearing it this summer!
Go Shopping!
This is a very useful FBA tutorial for bra style bodices.
I wear a UK 28G/30F, with 4″-6″ difference between full and above bust. Swim Lycra just isn’t strong enough to support the weight and stretches out, losing elasticity in no time flat. I would need to line this with a firmer, stronger fabric.
I was wondering why you didn’t fold out the side dart, enlarging the bottom dart, to maintain original style lines?
Thanks Karey. I’m not a super-experienced sewer and am self taught so I’m afraid it wasn’t something that even popped onto my radar to do. Maybe you could point me (and any readers) to somewhere this is described so we can try it? Thanks!